Now that we have a nice paginated list of posts, let's move onto to displaying full posts individually. I would like the URL /posts/some-title to lead to a page showing the post with the slug some-title. To do this, we need to create a content type template.
Start by generating a new page.
$ bundle exec wagon generate page posts/content_type_template
Do you prefer a HAML template ? no
create   app/views/pages/posts/content_type_template.liquid
conflict  app/views/pages/posts.liquid
Overwrite /Users/me/wisdom_for_wanderers/app/views/pages/posts.liquid? (enter "h" for help) [Ynaqdh] n
    skip  app/views/pages/posts.liquid
Content type templates are put in sub-directories with the name of the content type. The file name of a content type template should always be content_type_template.liquid.
Above we generated the file app/views/pages/posts/content_type_template.liquid to be the template for our posts content type. The generator also offered to create a app/views/pages/posts.liquid for us, but I turned down that offer since I didn't want to overwrite our current posts.liquid file.
The reason it stepped in to make sure we had a posts.liquid file is that templates in sub-directories inherit from the liquid file with the same name. Leave behind content types for a moment, and assume we we are just making some plain jane page templates with the following structure:
- legal.liquid
- legal/privacy_policy.liquid
- legal/termsofuse.liquid
- legal/dmca.liquid
Given the above file structure, legal.liquid is the parent template of privacy_policy.liquid, terms_of_use.liquid, and dmca.liquid. So if these child templates specify {% extends parent %}, they will will inherit from legal.liquid, which in turn inherits from index.liquid. So, for example, dmca.liquid can override blocks specified in legal.liquid.
As you would expect, the URLs of the legal pages match the directory structure:
- /legal
- /legal/privacy-policy
- /legal/terms-of-use
- /legal/dmca
Also, if we specified listed: true in the headers of the above templates, Legal would appear as a top level navigation item alongside Posts and About. Privacy Policy, Terms of Use, and DMCA would appear as children navigation items under Legal .
Make sense? Let's get back to our posts template. Modify the posts/content_type_template.liquid header to look like the YAML below.
---
title: Post Template
listed: false
published: true
content_type: posts
---
To start, the title is set to Post Template. The actual title of a content type template is always the label for the content type entry being displayed. In the case of our posts content type, the title field is used as the label, so our page's title will be title of whatever post is being displayed. However, the title specified in the header still shows up for site editors in the Pages section of the back-office, so I've set the title as Post Tempate.
After the title, we've indicated that we would not like to have the page listed in the site navigation and that the page is published. Finally, we encounter a new setting, content_type which allows us to specify what content type this page is a template for; in our case, it's the posts content type.
Let's move onto the body. Paste in the following content.
{% extends parent %}

{% block main %}

<article class="post">
  <h3 class="posted-at">
    Posted at {{ post.posted_at | localized_date: '%-I:%M %p' }} on {{ post.posted_at | localized_date: '%B, %-d %Y' }}
  </h3>

  {% if post.tags %}
    <p class="tags">
      <i class="glyphicon glyphicon-tags"></i>
      {% for tag in post.tags %}
        <span class="label label-primary">{{ tag | escape }}</span>
      {% endfor %}
    </p>
  {% endif %}
  <div class="body">
    {{ post.body }}
  </div>
</article>

{% endblock %}
The body start with the familiar extends tag and the rest of the template's content is enclosed in the main block.
To start off, we display the post's date using the localized_date filter we met in section 2.5. In a content type template, you always have access to a variable that represents the current entry. So if the visitor makes their way to /posts/some-title, the post drop holds the entry with the slug some-title. If we had a content type for widgets, the widget drop would be represent the current widget, and so on.
Next, we loop through the post's tags, displaying them with Bootstrap labels. Finally, we display the post's body. Note that we didn't display the featured image again. This was a conscious choice. Since the back-office allows editors to freely upload, manipulate, and insert images directly into rich text fields (like the body field), we'll let editors handle how they want pictures displayed in the article themselves.
Let's see how this template works in practice. Start the wagon web server and open your browser to the Posts page. Click on a "Read More" link for one of the posts.
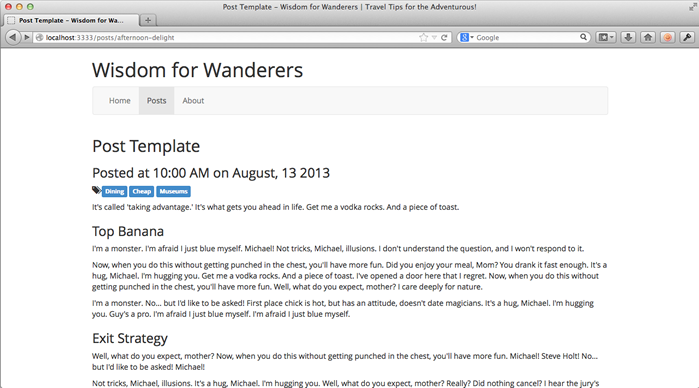
Basically, it looks like what I expected, but why does the title say Post Template? Shouldn't it say Afternoon Delight since that is the name of the post I am viewing? Well, it should because the page.title value of a content type template should be the value of the current entry's label. Interestingly, if we were looking at this page on the Engine (i.e. the real, live site), it would say Afternoon Delight, as expected.
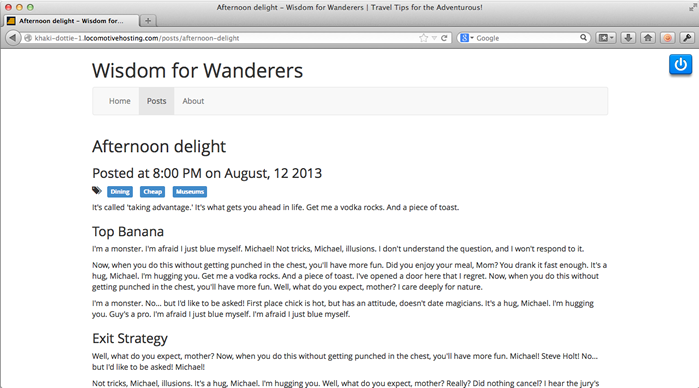
Truth be told, there is currently a bug in Wagon which results in content type templates not correctly setting their title. Of Wagon and Engine, Engine came first and is obviously the more important of the two since it serves the live site. As a result, Wagon is a little behind in some areas and you might notice a few other places where Wagon's functionality has not quite matched Engine's yet. But, don't worry: these issues are being dealt with and the LocomotiveCMS team will soon finish rounding off Wagon's remaining rough edges.
If we were to view this page in an Engine, it would look like the screen shot below.
Title mismatch aside, I'm pretty happy with the post template. Though I would like to make the post's date a little more discrete and increase the tag spacing a little bit. Add the following CSS to the public/styles.css file.
/* posts/content_type_template.liquid */
article.post p.tags span {
  margin-left: 10px;
}

article.post h3.posted-at {
  font-size: 20px;
  margin-top: 0px;
  color: #999;
}
Take another look in the browser.
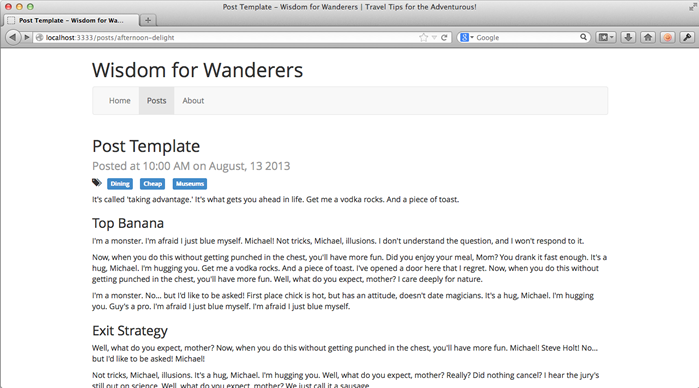
Much better.
Bonus: Fixing the home page
Now that our site can fully display blog posts, it has the essentials necessary to be considered an actual blog; we've reached version 1.0. To celebrate our site's coming of age, let's remove the home page's bland "Coming Soon" text and replace it with what every true home page has: a jumbotron call to action!
Open index.liquid and replace the h2 tag and main block with the content below.
{% if page.slug != "index" %}
  <h2>{{ page.title | escape }}</h2>
{% endif %}
{% block 'main' %}
  <div class="jumbotron">
    <h1>Life's to short not to get away for awhile!</h1>
    <p class="sub-title">
      Learn about cool places to see abroad, interesting things to eat, and little travel tips you won't believe you lived without.
    </p>
    <p>
      <a href="/posts" class="btn btn-primary btn-lg">
        Browse our articles
      </a>
    </p>
  </div>
{% endblock %}
Style the jumbotron element above by adding the following styles into the public/stylesheets/styles.css file.
/* home page */
body.page-index .jumbotron {
  color: #fff;
  text-align: justify;
  background-image: url('../images/new_york_at_night.jpg');
  background-position: center top;
}
body.page-index .jumbotron {
  padding-top: 10px;
  padding-bottom: 25%;
}
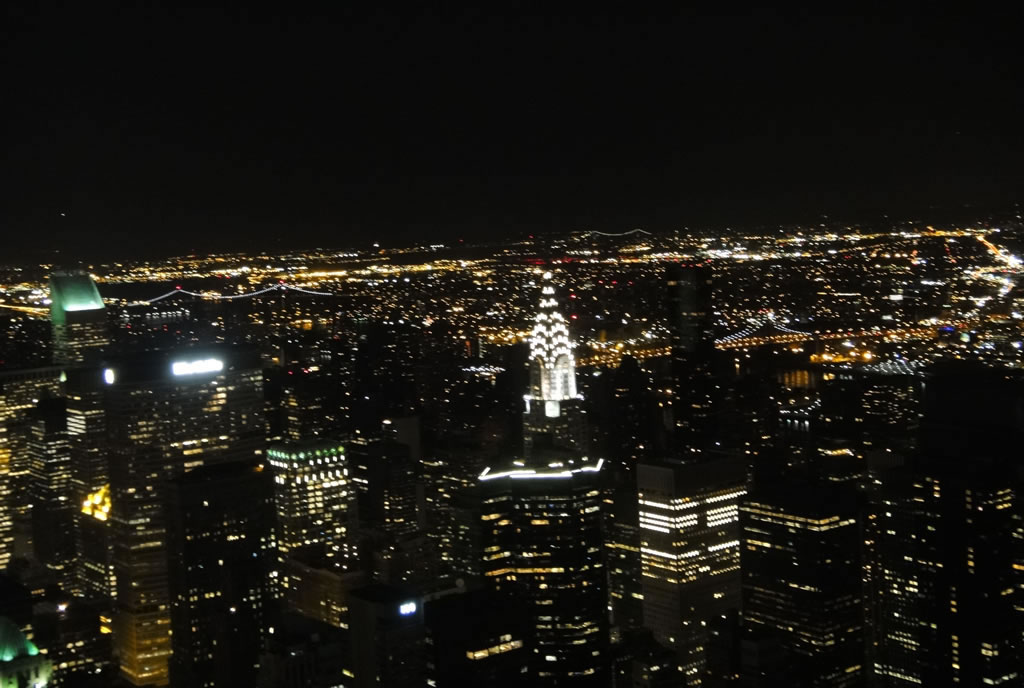
You'll notice that the styles above reference a new image file, which you can download here: new_york_at_night.jpg.
Preview the new home page in your browser.
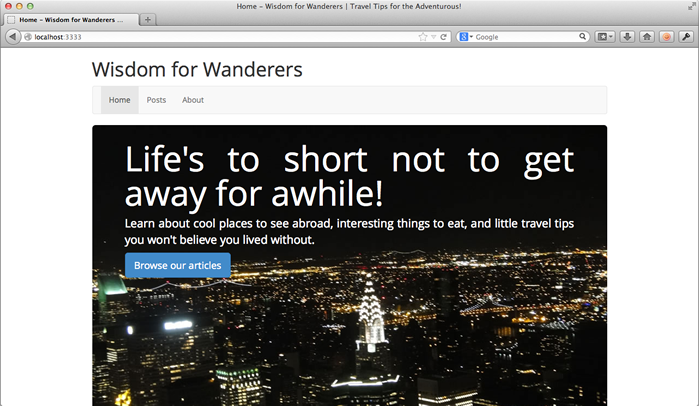
Looks great! Now, let's make the jumbotron text editable so site editors can change it at will. Replace the jumbotron div with the code below.
{% capture jumbotron_title %}
  {% editable_text "jumbotron_title", format: "raw", rows: 1 %}
    Life's to short not to get away for awhile!
  {% endeditable_text %}
{% endcapture %}
{% capture jumbotron_message %}
  {% editable_text "jumbotron_message", format: "raw", rows: 3 %}
    Learn about cool places to see abroad, interesting things to eat, and little travel tips you won't believe you lived without.
  {% endeditable_text %}
{% endcapture %}
{% capture jumbotron_button %}
  {% editable_text "jumbotron_button", format: "raw", rows: 1%}
    Browse our articles
  {% endeditable_text %}
{% endcapture %}
<div class="jumbotron">
  <h1>{{ jumbotron_title | escape }}</h1>
  <p class="sub-title">{{ jumbotron_message | escape }}</p>
  <p>
    <a href="/posts" class="btn btn-primary btn-lg">
      {{ jumbotron_button | escape }}
    </a>
  </p>
</div>
Finishing up
Today was pretty exciting. We created a post template to display individual posts, rounded off the site as a complete (if simple) blog. We've created a minimal viable product, as it were. To celebrate we fancied up the home page a bit, and voilà, we're at Wisdom for Wanderers 1.0.
Let's commit our changes.
$ git add app/views/pages/index.liquid public/stylesheets/styles.css app/views/pages/posts/ public/images/new_york_at_night.jpg
$ git rm public/images/temppeliaukio.jpg
$ git commit -m "Added a post template and a call to action on the home page."
In the next section we'll take a look at relating content types.
Next: related types